Showing posts with label Crafter's Workshop. Show all posts

Friday, May 3, 2013

May Challenge @ Once Upon A...Sketch (and my RAK WINNER!!)

Whew! Where did this week go?! Hard to believe it's already Friday here- but it is most definitely welcomed!!

Today I'm here to share with you the latest challenge at Once Upon A...Sketch- and don't forget to check the end of my post for the WINNER of my RAK from the C'est Magnifique Blog Hop this past weekend :)!
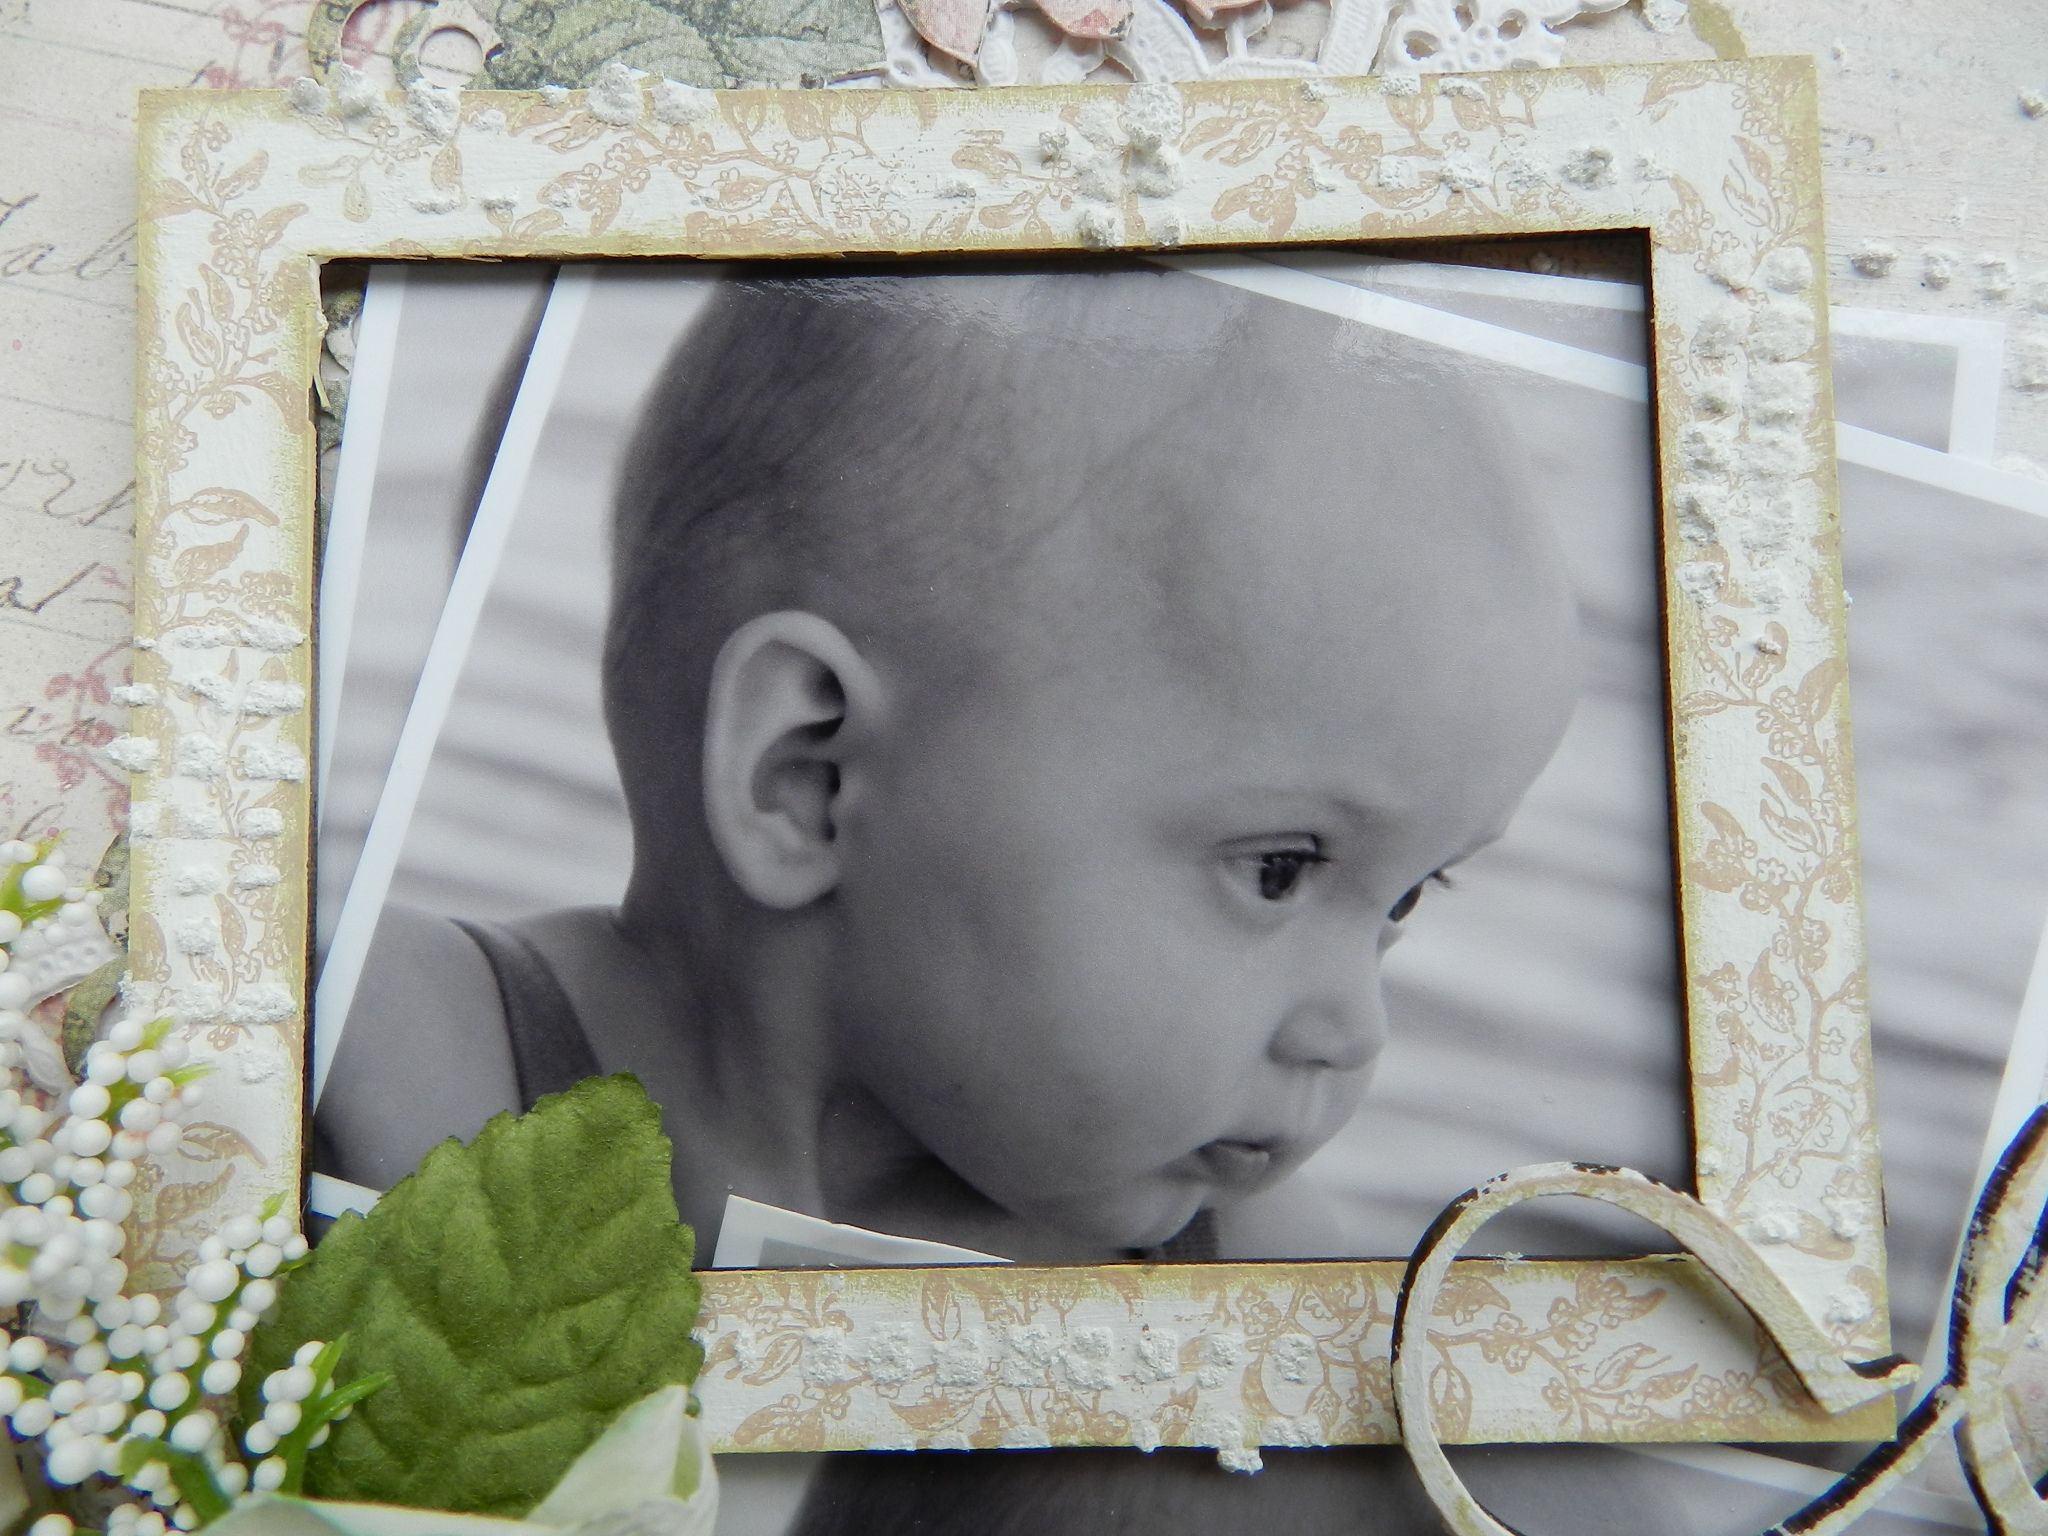
"6 Years"
It's incredible to me that over 6 years have gone by since my husband and I first got together. It was really nice to do a layout about him as I don't generally get the chance, and I likely would not have gotten this milestone recorded hadn't I been prompted by the latest challenge at Once Upon A...Sketch!


Theme: Numbers!!!

This month, we ask you to include a number , ANY number, on your layout. It has to be VISIBLE on your layout and it can be in your title or part of your journalling. It can be a date, an age, a house number, an anniversary, the number of children you have, the number of pets ....anything you like. But please make sure that there is some explanation through your journalling, somewhere on your page or blog about what this number means to you. 

Your layout must incorporate this theme and the sketch below. 

Let's take a look at some closeups :)

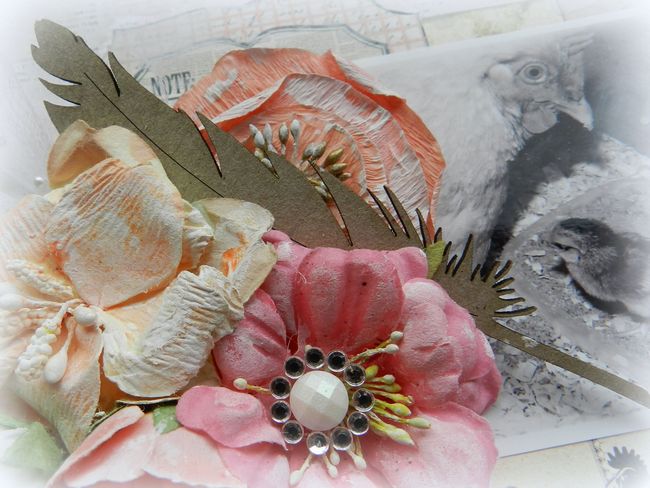
I've stamped this Blue Fern Studios "Vintage Key" piece to match other elements in my layout. Such a simple process but I always love the result!

 The chipboard cogs are from the "Widgetworks" pack from Blue Fern Studios :)

I love this splat mask from The Crafter's Workshop. Here I've used texture paste to give it some added body.

My hidden journaling :)

The deadline for this challenge is midnight May 25th Australian Eastern Standard Time. I'm excited to see eveyrone's entries- always interesting to see how the sketch and the journaling prompt are interpreted :).

NOW...on to the WINNER of my RAK from the C'est Magnifique Blog Hop!

After compiling all of the eligible entries and excluding duplicates, I randomized the list, numbered it, and entered it into random.org:


CONGRATS  to:
 
 Keridinha!!!!!!!!!!!!

 Please contact me within 7 days to claim your prize!! 
erin_divisionair@yahoo.com

Thanks again to everyone who participated in the hop!

Have a great weekend :)

Monday, October 8, 2012

"This..." (BITW & SWAT)~!

**IF YOU'RE HERE FOR THE WEBSTER'S PAGES BLOG HOP, PLEASE GO HERE~!**

**For my October giveaway, please go HERE**

Good morning and happy Monday!! (or Tuesday~ depends, I suppose!)~ I'm going to try and keep this post short and sweet as there's always much to do at the beginning of a new week~ especially because it seems the kids get a "daddy hangover" when Monday comes and he has to go back to work~ haha!!

I got the opportunity to fit in a little personal scrap time over the last few days and managed to put together a layout I've been meaning to get done for about a week now. I loved the photos, knew I wanted to use this Glitz collection- I just needed the "right" way to go about scrapping it. I knew I wanted to do the "Touch" challenge from Bird is the Word and then when I saw the fabulous sketch over at Sketches With A Twist~ I knew I had the perfect design to make this page happen...

"This..."
I had a really great week with my oldest, Wyatt, last week! Ages three and four have been tough on him (and me!)~ and this month he will turn five. Everyone keeps telling me that five is better...I really hope so! This last week really seemed that it was possible as he was just so pleasant :)~ so my heart really melts when I see this gorgeous photo of him.

Here's the fab sketch from Sketches With A Twist:
The "twist" for this sketch was to use stars in "one way or another". I found these old eyelet stars and thought they would work perfectly. I just used a hot glue gun to adhere them:


My hidden journaling, which reads: "...picture of Wyatt just touches my heart. He has such an amazing, sweet smile. He is just glowing! I love days like this one when I can just watch him play and love life. It makes me regret the days when I wish he were older. I want to just let him be a child because you only get to be one for a short time...September 2012."

So glad you stopped by and had a gander at my project today :)~ hope you have a great start to your week!! I will continue to have lots of projects to share, so be sure to check back here soon :D~!!

Thursday, October 4, 2012

Webster's Pages "Trick or Treat" Blog Hop!!

**For my October giveaway, please go HERE**

Hi everyone and welcome to the Webster's Pages "Trick or Treat" Blog Hop!! If you've arrived here from Diana's blog, then you're right on track! If not, head back to the beginning of the hop HERE at the Webster's Pages blog :). Why? Because there are SEVEN mystery prizes hidden amongst the blogs along the way- and the only way you can make sure you're in the running to win is to leave a comment at EVERY blog along the hop!!

Blog Hop Order
Erin Blegen <---HERE!

I hope you've enjoyed all the amazing ideas thus far for inspiring your own "handmade Halloween", and I assure you- there's much more to come!! We're celebrating this spookiest of holidays with the fabulous "Once Upon A Halloween" collection from Webster's Pages~ and let me tell you, it's been a real TREAT (hee hee) designing with this range. And for this very special event, I put together a fun "Halloween scene" layout.


 All a project like this needs is a little bit of inspiration. I had the adorable photo- but I needed the perfect "scene" in which to place him. So I started with this "Haunted House":


I fussy cut the house and then layered it over the windows. Of course this house needed to be brought to "life" to suit my spooky scene. I wanted it to be a bit grungy and scary- one that might entice the "spooked" look on my little guy's face! So I used some texture paste and a brick mask for the wall, which I then sprayed with a bit of orange and black mist. 

Then with a small circle punch I punched away at the "Lantern Light" paper before snipping in half and layering over my rooftop.

I brought to life the "lights" in the doorway with a little bling and then borrowed a treat bag from the "Trick or Treat" paper...

Let the fussy cutting begin! Lots of intricate details "carved" from the "Pumpkin Carving" paper:

Other Products Used:

Halloween Frame (Scrap FX)

Thanks so very much for visiting my blog and taking a look at my project :). I hope I've added to the inspiration today and encouraged you to keep on going~ Your next stop is the gorgeous and talented Tomoko Takahashi~ I'm certain you'll be blown away by what she's created just for you :D~ Happy Hopping and Good Luck~!!

Saturday, September 29, 2012

Scrap FX Reveal #2 & #3!!

**Just one day left! Enter my September giveaway HERE, and check in tomorrow for my October giveaway~!!**

Good afternoon! I hope your weekend is going well- it's a GORGEOUS day here and I'm planning to take the kids out this evening for some fall pictures before the leaves are all gone. We had a great birthday party last night for DH and some of you were interested in the recipe for his Chocolate Chip Cookies Surprise Cake~ well, you can find the amazing recipe HERE!! He requests this for his birthday every year as he's a yellow cake AND chocolate chip cookie fanatic- and finding this recipe just seemed too perfect for him :). I hope you enjoy it too!

I'm here today to share with you my last two project for the month of September for Scrap FX. We played with the "animal" theme this month, which I know appeals to lots and lots of you animal lovers out there! Here's my project, as seen on the Scrap FX blog...

I have owned various animals throughout my life from horses to cats and dogs to shrews, bumblebees, birds of all kinds…but almost always, we had chickens. My sister and I used to dress up our chickens in doll clothes! I’ve had a special connection to them all my life and currently have a very interesting and diverse flock. Almost all of my chickens are of different rare breeds and I own both standard and bantam (miniature) size birds. This summer, I let several different hens set on eggs. We hatched out a couple different sets, and the two darlings in my layout were from the second set, with a mother hen who was a little slow to take to her duties. Thankfully I’m a great “mother hen” myself and took care of the babies until the mom was ready. Luckily since then, she’s turned out to be a great mom and I’ve really enjoyed having these fuzzy little guys around :) .

"Feathered Friends"
 I don’t normally leave chipboard raw, but here I thought it worked really well. The only chipboard piece I touched up was the title…

I used some bisque liquid pearls and glitter to accent my “Feathered Friends” title. The beautiful “Ruffled Feather” I placed underneath and thought it was just so beautiful as it was :) .

This intricate “Birdcage C Vine” piece was the perfect addition to my layout. I love it! Just a couple teeny little liquid pearls and a resin bird and I was set.

I couldn’t not use one of these “Feathers“. Just settled in amongst my flowers seemed right. I allow my chickens to free range here (meaning they are not kept in their coop all the time- only at night), so they’re all over the place, all day long- and you can bet I find feathers everywhere!!

I’ve used a tag from the “Tags, mixed cream” pack to create a tab for my hidden journaling. These tags are of different lengths and widths, making hidden journaling a snap on any layout!

Next I have a card for you!

"Forever in my Heart"
 I know that this “Forever in my Heart” title was meant for a layout about a the loss of a pet, but I thought it would be a perfect sentiment for a sympathy card. I’ve painted it with gesso and then used a script stamp and distress ink over top. The pretty scroll piece beneath my title is actually snipped from what I had left of the “Gates A, large (scrolls)“, used in part on a layout a while back. I definitely love getting the most out of my chipboard and here’s just one example of how to do that!

Scrap FX Chipboard Used:


Other Materials Used:
  • Prima Marketing "Rondelle" & "Almanac" Patterned Papers
  • Manor House Creations & Prima Marketing Flowers
  • Prima Marketing Resins & Bling
  • Inkidinkido Stamp
  • Prima Marketing Script Stamp
  • Tim Holtz "Frayed  Burlap" Distress Ink
  • Mr. Huey's Mist
  • The Crafter's Workshop Mask
  • Martha Stewart Texture Effect
  • gesso, tulle picks, doily, seam binding

Thanks for stopping in~ I'll be back tomorrow to reveal my October giveaway!! See you then :)~!

Thursday, August 30, 2012

One more look at the September Kit (C'est Magnifique)

Good morning! Hope you're all more awake than me today, lol! I stayed up late last night working on a project and dealing with nuisance bears (mom and cub) tearing apart my garbage can/garbage. From about 10:30 PM- 11:30 PM I watched/yelled at them. Unfortunately, they weren't really all that concerned with me. So my poor husband had to clean up the mess this morning before work. And then my 2-year old was up at his usual 6:00 AM time...and I could really use more sleep.

BUT- I have some time to put together a blog post and show you the last of my projects for C'est Magnifique this month! We've revealed the entire September kit, featuring papers from Riddersholm Design (Denmark), and here's what more I have to share with you :)...

"Free Bird"
This layout was inspired by Maya Angelou's "I Know Why The Caged Bird Sings". My sweet little girl is already such a free spirit, always happy, endlessly sweet. So naturally I used the "bird" elements in this kit, including the paper, bird cage, and wooden embellishment. I had a lot of fun playing with the background, adding layers of masking with texture paste topped off with embossing powder, and the Lindy's Stamp Gang mist provided in the main kit. I wanted to create something playful and fun, just like my little Aspen :).
 
From the Flower Add-On:
Manor House Creations: Imagine: Cocoa
Prima: Celyon: Attic
Prima: Charme Rose: Nature's Garden
Maya Road: Vintage Lace Daisies: Milk

From the Embellishment Add-On:
Prima: Wood Embellishments: Birds

From My Stash:
The Crafter's Workshop: Wall, Mini Tile Texture, & Chicken Wire Reversed
Martha Stewart: Texture Effect
Prima Marketing: Script Stamp
Making Memories leaf stamp
Prima Marketing: Shabby Tote & Knotted Wood Chalk Fluid Edger Pads
gesso
 
"The Heart Sees"
 I really enjoyed combining the many colors in the kit on this one, especially the rust tones. I used the mist from the embellishment add-on to darken the peach flowers a bit to better coordinate with the rest of the elements on my layout, and really love the result :)...
 
From the Flower Add-On:
Manor House Creations: Imagine: Cocoa
Prima: Charme Rose: Nature's Garden
Prima: Coventry: Tranquil

From the Embellishment Add-On:
Prima: Wood Embellishments: Birds
Bo Bunny: Rub-Ons: Weekend Market
Lindy's Stamp Gang: Starbursts: Canna Lily Burnt Orange

From My Stash:
doilies, gesso
 
"Be Happy" Card
 From the Flower Add-On:
Manor House Creations: Imagine: Cocoa

From My Stash:
Prima Marketing: Chalk Fluid Edger Pad: Dry Sand
Martha Stewart: Border Punch: Optic Dot
doily
gesso
 
Thank-you so much for stopping in! If you love the look of this kit, be sure to check out the September section of the store HERE, where you can purchase the kit, add-ons, and individual items :).
Take care!


Friday, August 10, 2012

Scrap FX: August Reveal #1!!

 **For my giveaway, please go HERE**

Hey there everyone!! Hope you're all having a great weekend so far- I'm hoping to accomplish some scrappy tasks- but wanted to make sure I got on here to post my first Scrap FX reveal for August!!

A new month means a new theme at Scrap FX, and this month it’s travel! I’m a bit tied down with having three children ages 4 and under, so I really don’t get to travel much- other than locally. So I decided to create a page about why I love my state- and chose to scrap a photo of my daughter by the lake. The abundant number of bodies of water here has earned Minnesota the title “Land of 10,000 Lakes”~ and it is most definitely one of my favorite things about where I live :).

"(Love) Minnesota"

Let’s take a closer look at the Scrap FX chipboard used in this piece…

I’ve said it before, and I’ll say it again: Scrap FX has a HUGE supply of chipboard titles and I LOVE them!! This particular piece was specially made for me as my state wasn’t included in the available travel-themed wordlets- take a look at the hoard included in the collection HERE.

What travel layout wouldn’t be complete without a compass? I love adding chipboard to my flower clusters and this one fit right in :) . I’ve simply painted it white before using a flourish stamp over top and inking the edges.

Flourishes like this one (Flourish Z) are a staple for any chipboard stash!

I love the backdrop frames that come in the frame packs (like Decorative Frame A Artsy). They’re perfect for adding that “something extra” to your photos :) .

Scrap FX Chipboard Used:


Additional Supplies Used:

~Prima Marketing "Tea Thyme" papers
~Manor House Creations, Prima Marketing, & KaiserCraft flowers
~Manor House Creations sprig
~Prima Marketing leaves
~Melissa Frances pearls
~Martha Stewart "Optic Dot" border punch
~Prima Marketing "Shabby Tote" & "Dry Sand" chalk fluid edger pads
~doilies, lace, gesso 

Thanks so much for stopping by for a visit!! If you'd like to find some Scrap FX chipboard for yourself, I have included a list of some online stores currently selling their products under the FAQs tab at the top of my blog :).

I did also want to mention also that August 13th, Webster's Pages will be doing a Blog Hop to celebrate the shipping of their new products!! So make sure you tune in for details- there are some great prizes to be won and I'm super excited to be a part of the hop!! :D

See you soon!!